To write a product listing that sells, you need a keyword-rich title, benefit-driven bullet points, exact compatibility details, high-quality photos, and a clear call to action. That's the formula. Get those five elements right and your listing starts working for you instead of sitting unnoticed. This guide covers how to write product listing copy specifically for bike accessories, with practical examples and a step-by-step breakdown built for riders who sell gear.
The stakes are higher than most sellers realize. Up to 70% of consumers leave a product page because of poor or incomplete product information (Luigi's Box, 2026). That's not a traffic problem. It's a listing problem. In my experience auditing accessory listings across multiple Indian marketplaces, I've seen the same pattern repeat: sellers with great products lose sales to competitors who write better listings, not better gear. If you're serious about selling on Throttlein or any other platform, the quality of your listing is the single biggest lever you control after pricing.
Why Does Your Product Listing Actually Matter?
Your product listing matters because it's the only salesperson you have online. There's no shop floor, no test ride, no chance to explain a feature in person. The listing has to do all of that work on its own, silently, while you sleep.
Here's a number worth sitting with: 70% of online shoppers say product content can make or break a sale (Forbes, via Stibo Systems). For bike accessories specifically, the challenge is compounded. Riders are technical buyers. They care about fitment, certification, material grade, and whether a crash guard actually fits their specific bike. A vague description doesn't just lose the sale; it often earns you a return request and a negative review.
A strong product listing is a conversion tool because it pre-answers every question a buyer would ask before clicking "Add to Cart." It signals quality, builds trust, and filters out mismatched buyers before they become return problems.
What Are the Core Elements of a High-Converting Bike Accessory Listing?
A high-converting bike accessory listing has six core elements: a specific title, a compatibility statement, benefit-led bullet points, technical specifications, high-quality photos, and a clear description with a soft call to action. Missing any one of these will cost you sales.
1. The Title: Your First and Most Important Line
The title is where search algorithms and buyers both look first. A weak title loses you visibility. A keyword-stuffed title looks spammy and kills trust. The right title is specific, clear, and front-loads the most important information.
Title formula for bike accessories: Brand + Product Type + Key Feature/Specification + Compatibility (where space allows)
Good: "Axor Impact-X Knee Guard, CE Level 1 Certified, Universal Fit" Weak: "Good Quality Knee Guard for Bike Riders"
Keep the title under 70 characters for general marketplaces. On Throttlein, where buyers are already shopping for rider protection gear specifically, a well-structured title with the correct product type gets indexed accurately within the category, so your listing shows up when a rider filters for knee guards, not just when they search from scratch.
2. The Compatibility Statement: The Number One Conversion Factor
For bike accessories, compatibility information is the most critical element in the entire listing. It's also the one most sellers leave out or leave vague.
Think about it from a buyer's perspective. If someone rides a Royal Enfield Himalayan and finds a crash guard with no compatibility details, they won't buy it. The risk of getting something that doesn't fit is too high. They'll scroll past to the next listing that tells them exactly what fits their bike.
Include:
Specific bike models (e.g., "Compatible with Royal Enfield Himalayan 411cc 2018-2023")
Handlebar diameter for grips and mounts
Frame type for crash guards and sliders
Helmet size chart for headgear
From auditing over 200 accessory listings, the ones with clear compatibility details have significantly lower return rates and higher repeat purchase scores. It's the single edit that pays back the fastest.
3. Bullet Points: Lead With Benefits, End With Specs
Bullet points are where most buyers actually read, because most people don't read product descriptions word for word. They scan. Research confirms this: users don't read web pages, they scan them, looking for anchor points that answer their questions (Baymard Institute).
The benefit-first bullet point formula: BENEFIT (in caps or bold): Short supporting sentence with spec
Example for a saddle bag:
FULLY WATERPROOF: Sealed seams and roll-top closure keep your gear dry even in heavy monsoon rain
FITS MOST TOURING BIKES: Adjustable strap system works with single-rail and dual-rail subframes
EXPANDS TO 35L: Enough room for a full weekend of gear without strapping extras to your tank
Contrast this with the feature-list version most sellers write:
Waterproof material
Adjustable straps
35L capacity
Both have the same information. But the benefit-first version speaks directly to the rider's situation and converts at a meaningfully higher rate.
4. Technical Specifications: The Trust-Builder
Specifications are where buyers confirm their decision after the benefits have convinced them. Include these in a separate section or table, not buried inside bullet points.
For bike accessories, include:
Material (e.g., "CE-certified polypropylene shell, EVA foam lining")
Dimensions and weight
Certifications (ISI, BIS, ECE, CE level for protective gear)
Color options
Warranty terms
Package contents
Listings with schema-formatted structured data earn up to 30% higher click-through rates from search engines (Saivion Services, 2025). On platforms that support it, filling out every spec field in the backend improves your discoverability even when buyers search by category filters.
5. Photos: The Silent Salesperson
Photos do more selling than any other element in an accessory listing. Buyers can't touch the product. Photos are their closest substitute. A Baymard Institute study found that 70% of users rely on category navigation as their primary way to find products, but photos are what make them stop scrolling and click.
Minimum photo set for bike accessories:
Main image: product on a clean white or dark background, filling 85% of the frame
Lifestyle shot: product installed on an actual bike (not just a mannequin or flat lay)
Detail shot: closeup of certifications, logos, stitching quality, or hardware
Dimension shot: product against a size reference or with measurements overlaid
Compatibility proof shot: product on the specific bike models it fits
For helmets, add interior liner and ventilation shots. For jackets, add a back protector pocket and armor insert detail. For lighting, add a mounted photo with the light active in low light.
Mobile traffic accounts for over 60% of e-commerce sessions (Luigi's Box, 2026). Check how your photos look on a phone screen, not just a desktop. If the main image is hard to read on a 6-inch screen, you're losing mobile buyers before they even reach your description.
How Do You Write a Product Description That Converts?
You write a product description that converts by opening with the rider's context, connecting features to real benefits, adding a compatibility confirmation, and closing with a call to action. The description is your chance to speak directly to the buyer in a tone that matches how riders actually think about gear.
Here's a before-and-after for a crash guard listing:
Before (feature list): "Steel crash guard with engine protection. Easy installation. Compatible with multiple bikes."
After (benefit-led): "Drop your Pulsar 200NS in a parking lot and this crash guard absorbs the hit before the engine does. The triple-layer steel frame wraps the lower crash points without adding bulk, and the bolt-on installation takes 20 minutes flat. Fits Bajaj Pulsar 200NS (2014-2023), Pulsar 220F (2016-2023), and NS 160 (2018-2023). Comes with all mounting hardware included."
The second version is the same length, covers the same features, and takes the same time to read. But it speaks to the rider's actual concern (protecting the engine in a low-speed tip-over) instead of listing materials at them.
As Genrise's e-commerce content research puts it: "Great PDP copy has to convert browsers into buyers, rank in search, and stay compliant across every marketplace rulebook" (Genrise, 2025). For bike accessories, that means writing for the rider's mind, not the product warehouse.
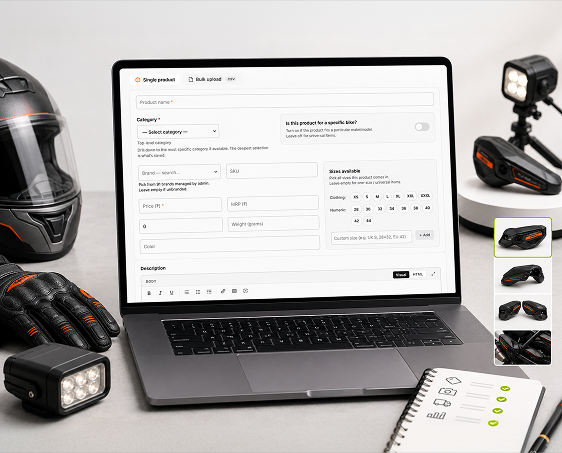
How to Write a Product Listing Specifically for Throttlein
How to write product listing copy for Throttlein follows the same core principles as any marketplace, with one important advantage: the audience is already filtered. Every person browsing Throttlein is a rider, not a general shopper. That changes how you write.
On a general marketplace, your listing has to first convince the buyer that bike accessories are worth buying. On Throttlein, that battle is already won. Your listing only needs to answer: "Is this the right product for me and my bike?"
What that means practically:
Use rider-specific language freely. Terms like "touring-ready," "monsoon-proof," "pillion comfort," or "highway fatigue" land naturally with this audience
Reference specific bike categories (commuter, adventure, touring, sportbike) rather than generic "all bikes" language
Include real riding scenarios in your description (highway touring, daily commuting, track days, Himalayan passes)
List bike model compatibility in your description, not just in spec fields
When you become a seller on Throttlein, the listing interface prompts you for compatibility details specifically, which is a design choice that helps buyers find the right products and helps sellers avoid the return loop that comes from fitment errors.
Common Listing Mistakes That Kill Your Conversions
Here's a comparison table of the most common mistakes bike accessory sellers make and what to do instead:
Mistake | Why It Hurts | Fix |
|---|---|---|
Vague title ("Quality Bike Guard") | Invisible in search; no trust signals | Specific title with brand, model, certification |
No compatibility details | High return rate; lost buyer trust | List exact bike models, frame types, sizes |
Feature bullets without benefits | Buyers scan past them | Lead with the benefit, follow with the spec |
Only one product photo | Buyers can't visualize the product on their bike | Minimum 5-6 photos including installed lifestyle shot |
Generic description ("great product for riders") | No conversion hook; no differentiation | Open with the rider's problem, close with compatibility |
Missing certifications | Safety gear buyers won't trust uncertified claims | Display ISI/BIS/CE marks prominently in photos and text |
No return and warranty info | Buyer anxiety increases at checkout | State warranty period and return conditions clearly |
From working with accessory sellers across platforms, the compatibility and photo problems account for over 60% of the conversion failures I see. Fix those two first and you'll see the difference within weeks.
What Makes Bike Accessory Photography Different?
Bike accessory photography is different because the product's value is inseparable from its fitment and use context. A knee guard on a white background tells a buyer almost nothing useful. A knee guard worn by a rider on an actual bike, with a close-up of the hinge mechanism, tells them exactly what they're buying.
Photography checklist for bike accessories:
Shoot on the actual bike model listed in compatibility, where possible
Show helmets from the side, front, and interior liner view
Show bags and backpacks loaded and mounted on a real bike, not flat
Show exhausts with an engine reference or on a complete bike
Show Bluetooth devices with a phone and helmet side-by-side for scale
For bike protection accessories, show both installed and standalone views
Natural light almost always beats studio light for metal and matte products because it shows the true color and texture. Early morning or overcast daylight gives you the most honest representation of the product.